Wednesday, August 31, 2011

Better pics and a better bod!


I already mentioned that I had a few goals for September and it's time to get started!

Because the tutorial for taking better photos is a 31 day adventure, I'll be starting tonight and doing my "homework" from Darcy. I'm looking forward to learning more about my camera and getting better shots. Hopefully, telling you about my goal will keep me accountable and I'll finish the series. We'll see.

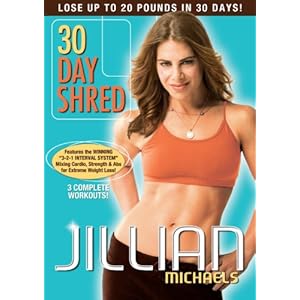
As for my other goal, my arms are sore just from taking the plastic wrapper off the DVD case. That is NOT a good sign. But I need to be stronger, for me and for my girls. So again, keep me accountable and I'll let you know how it's been going.

I'm thinking a weekly post with a recap of the week's progress is how we'll do this. If you wanna join the fun let me know if you've set any goals for the week, month, or even the rest of the year. Sometimes my daily goal is only to end the day having had a shower so making TWO big commitments is huge for me.

Wish me luck!

And on a side note, the girls and I are here with family in Missouri and I got a text from The Hubs saying that he has safely arrived at his destination. Thank God for modern communication! Can you imagine what it was like earlier in the century, even as recent as Desert Storm, to wait weeks or months to hear from loved ones. I feel so blessed that he could send me a text from over 8000 miles away. I'm sure it cost us but it's well worth the peace of mind. Now I'll just wait until he figures out how/when he can call or Skype.

Tuesday, August 30, 2011

School days!

School started in Vegas yesterday (I mistakenly left my house just as 100 gazillion kids and parents were walking to school near our house) and here's what I would pack if it was my first day:

back to school supplies


Love this pencil box and love to keep my freshly sharpened #2s organized.

Isn't this bento style lunch box awesome? A little pricey but so cool!

Always single subject, college ruled notebooks for me. Always.
I'm a 24 pack crayon kinda girl . Although I was always jealous of the kids with the sharpeners.

LL Bean fo' life! Their backpacks take a beating and keep on keepin' on. I still have mine from college. Sometimes I wish it would break/rip/get ruined so I could justify a more hip color.

All the cool kids will be showing up with a pop tab bracelet. And of course I'll take a couple extra to pass out to my brand new bff's.

I love to flag important pages. Heck, I love to flag unimportant pages!

I chose this calculator over the TI-84 because I can do tough math in my head. This little number cruncher just looks cute sitting on my desk.

I just love school supplies. I think I might go wander the aisles at Staples and drink in all the deliciousness that is back-to-school!


Monday, August 29, 2011

Poms the bomb.


I've been on a kick lately of using old-school, common crafting materials to make stuff. First was the felt circle pillow (um, using what else, felt), then the circle paper garland (regular construction paper), and now I'm gonna show you what I did with little fuzzy pom poms. I don't think I've even touched one of those since vacation bible school when I was 10, but retro is cool, right? Anyway, I was inspired by this image from Pinterest:


Source: pickles.no via Lovely on Pinterest

These are some much fancier type of ball but I just loved the look and decided to make my spin on it for E's birthday. I got a big ol' E from JoAnns, a few bags (I used almost 4) of poms at Michaels, and wet to work with my hot glue gun.

First I painted the cardboard E because, you know, it was brown. I just used some white wall paint that was left by our builders. I think if I'd used craft paint I could have done the project with Elmer's glue but the interior paint was a little too slippery (and The G didn't appreciate the blister she got from touching some not-so-dry hot glue. oops.).


I think if I'd used craft paint, I could have done the project with Elmer's glue but the interior paint was a little too slippery (the Elmer's would have been nice because The G didn't appreciate the blister she got from touching some not-quite-dry hot glue. oops.

Here's an in-process shot:


I was making this for her birthday so I went with the rainbow theme and I think it turned out super awesome!

rainbow pom pom letter

I hung it on the front door on party day, brought it in after everyone had arrived for some photos, and now I think I'll hang it in her room. I'm hoping this can be a photo prop for all her future birthdays (at least until she's 12 or so and thinks everything I do is totally lame). What do you think? Sound like a good idea?


This was at 8:30 at night after the party. She was definitely ready for bed so I need to set Sweet E up with her "E" again for a true photo op.

Have you done any crafts lately with elementary-school inspired materials? Finished any Pinterest inspired crafts? Let me know! I'd love to check them out.

Update: The day I wrote this post I got an issue of FamilyFun Magazine in the mail and lo and behold, what was on the cover? You guessed it. A pom pom craft.


Looks like these little guys are making a resurgence (or maybe they were never uncool?).


I'm linking up at:

Confessions of a Stay At Home Mommy


CraftOManiac

Friday, August 26, 2011

Fall Fashion 2011

In the spirit of back to school shopping, I decided to show you what I'm planning to wear this fall. And, I'm going to get a true autumn (um, Fall in Las Vegas doesn't count) since we'll be heading to the midwest soon. I need A LOT of stuff because last year I was still chubby from having The E and didn't buy much. Now, don't get me wrong, I'm still chubby soft. Its just that I've embraced it and do not have false hope that I can squeeze into a size 4 for this fall (not that I ever have been a size 4 but you know how when you're pregnant you're just sure you're gonna come out on the other end with this rockin' bod? No? I'm the only delusional one, I guess). My goal is to keep the total under $600 for both the girls and I. Seriously. It seems like so much but I could spend that on two totally sweet pair of Frye's in a second (these and these, which I won't, but I could. Just sayin'.).

So here are the looks I put together over at Polyvore:

Fall - Weekday Chillin'


$138
(ok, $285 w/ the diaper bag but its SOOOO awesome)


Fall - Festival Fashion


$147

This whole fall wardrobe will cost me a total of $369!!! That leaves me over $200 to fill in the gaps for my girls and get them a few fun things as the season progresses (or $80 if I buy the diaper bag. I really, really, really want it. Have I ever told you how I never picked out my own diaper bag and have used the same two (that I didn't pick out for myself) with E that I had almost 4 years ago with G? I think diaper bags are like bras or jeans. Its such a personal choice and I got gipped because after receiving 2 as gifts I couldn't justify buying myself another one). Oh, and don't feel sorry for my girls. They won't be naked in the cold or anything ridiculous like that. They have plenty of clothes already.

What about you? Have you already bought some warmer weather stuff that's just sitting in your closet? Is it calling out to you "It doesn't matter that its 110 degrees outside. Just crank the air and you can wear me now..."?

Thursday, August 25, 2011

The icing on the cake! {A rainbow cake tutorial}

six layer rainbow cake

I want to talk to you about the rainbow cake. You know the one. I showed you mine and if you're a blog reader I'm sure you've seen at least 3 others. What you haven't seen is the dirty, seedy underbelly of multi-layer cake making. So I'm here to expose the truth. This cake is actually easy peasy lemon squeezy. Sort of.

First tip. You need to start early, allowing at least two hours for the cake to sit in the fridge after the crumb layer of icing is added. I started the night before.

Some of this info will come as no surprise, but being my first time making more than 2 layers, I had a lot to learn. And decided that my daughter's first birthday cake may not have been the place to try out this new baking apron. Oh well, too late. Here's what you need:
  • two boxes of white cake mix and eggs, oil, water. With me so far. Just checking.
  • 3 eight or nine inch round pans in helpful but you at least want 2 (I used the aluminum disposable kind that come in a 3-pack and they worked great)
  • a boatload of white icing (I used whipped fluffy white, yummy stuff), I used 2 large containers and 2 1/2 small containers. Seriously. I suppose you could skimp a little but this cake is all about going overboard, right?
  • food coloring. I read that you should use the gel kind but I used both and got vibrant colors. I guess the fear is that the liquid, old-school kind might change the consistency of the batter making it bake weird but I didn't have any trouble. Well, not with that part anyway.
Now we're ready to start.
  1. Make the first box of cake according to package directions. I read one tutorial that suggested you mix both at the same time but I didn't want all 6 layers in the oven at once. I was afraid it would throw off the whole chemistry-science-y thing of baking by overloading the oven. I'm pretty sure Alton Brown would agree. Plus, you can mix the second cake and color it while the first batch bakes.

  2. Divvy your batter into 3 bowls. Use between 1 1/3 and 1 1/2 cups of batter for equal layers.

  3. Add food coloring.


    We did the purple (blue + red people...more blue), blue, and green first. I used a lot because I wanted it super vibrant but remember that the color will deepen as it sits and bakes. So if you want pastels just use a tiny bit OR go crazy like we did and use half the bottle of each color. Whatever floats your boat.

  4. Pour the batter into 3 greased pans and bake at 350. DO NOT turn your oven off when you are setting the timer. Why would you do that? I'm not sure but I accidentally did and it sucked. When I checked the cakes after 15 minutes not only were they not baking, but they were barely luke warm. Oops. My bad. So I had to babysit them and PRAY that they turned out ok. Which they did. Phew. Dodged my first bullet.

  5. Repeat steps 1-4 but use red, orange, and yellow food coloring. Also, skip that whole turning off the oven part. Here's where I can tell you to bake the layers approximately 23 minutes (if you've divided the batter into 3's. If you're crazy and going for 8 layers I can only offer this piece of advice... OK. I have no advice for that. Good luck, freak.).

  6. Let the cake cool in the pan 10 minutes then turn out onto cooling rack. Let it cool completely before icing.
Now, on to the icing of this monstrosity. Here is where things got a bit tricky for me. Don't worry, I'll share all the gory details.
  1. Place sheets of parchment or wax paper on your cake stand/plate where the edges of the cake will be.


    This lets you ice all willy nilly and not worry about having a messy looking plate when you're done.

  2. Place the first layer on the plate, purple in my case, and ice the top. Make this as thin as you can stand (I used quite a bit because I lurve icing) because you don't want the next layer to slip off.

  3. On to layer two, blue. THIS IS IMPORTANT!!! Place this next layer with the TOP DOWN (the rounded part). You can of course, trim the layers so they are nice and flat but I think this is hard and you end up with less cake (for shame!). By rotating the layers you keep the cake more level and don't get a big rounded top with slopey sides. You will see why this is important in just a second and also that I was not this wise 2 nights ago. Then ice that layer.

  4. Repeat the layering, icing steps with green, yellow, orange, and red remembering to alternate the way you place the layer.


  5. Does that make sense? I hope so. Because if you don't do this (or cut the rounded bit off) this will happen:

    crack in layer cake

    It may look like a small crack to you, but to me, it was the Grand Canyon of cakes. I tried sticking wooden skewers but it just kept cracking because the top was higher than all the sides. See why you want to alternate the layers. Oh, and Mom, thanks for telling me this little trick when I was placing the LAST LAYER! But, my friend KC saved the day (you'll see how in a second).

  6. Next, put a thin layer of icing around the sides (this is called the crumb layer). I then propped up the side of the cake with a bottle of KC Masterpiece and stuck that puppy in the fridge overnight not knowing whether I would have a salvageable cake in the morning or not. Hopefully you'll be able to skip this step.

    propped up layer cake

    In the morning, she had hardened just enough that there was no more slippage and the bbq sauce bottle had saved the day! Sweet hallelujah!

  7. The last step is to finish icing the cake (which didn't get any weird crummies on it because of letting that first, or crumb, layer of icing harden in the fridge).
Now I waited. 3 1/2 more hours until the party, in fact, to see if my cake would look and taste ok.


And as you can see, it was wonderful! Huge hit, the crowd oohed and ahhed as my husband sliced it up. Seriously. They did. Then they devoured it. I was worried that being in the fridge overnight would make it weird or that my snafu with turning off the oven had ruined layers 1 through 3 but no, it was delicious. Or scrumptious, as G would say. In fact, she actually said, "This really tastes like a rainbow!" That made it all worth it.

slice of six layer rainbow cake

I hope this has been a lesson to all of you that you should practice something important before winging it the night before it is due. Wait. Didn't I do that all through college? Anyway, I probably haven't learned my lesson on trying something new without a dry run when I'm under the gun, but I did learn how to make a six layer rainbow cake.

rainbow cake

I'm linking up at:

Home Stories A 2 Z


Weekend Bloggy Reading

Wednesday, August 24, 2011

31 days has September

Ok. So September only has 30 days but you'll see why I need 31 (wouldnt it be nice to squeeze an extra day into that great autumn month?). I mentioned last week that there are some big changes happening around here on very short notice. My Hubs is going to be gone for a while for work so we will be staying with my parents for the duration. Its hard to pick up and leave our life, but I know that this time while the girls aren't in school is fleeting. So we choose to disrupt a bit and be with my family while we are free to do so. Soon enough we'll only be able to sneak away during the summer and on winter and spring breaks (I'm not looking forward to that... I love traveling whenever I please!).

So, because I won't be here, working on getting this house whipped into shape, I'm not sure what kind of posts you'll see from me. I'm hoping to do quite a bit of sewing like finishing this, making this, and trying this, but its possible that I could totally lame out on that.

So instead, I've decided to commit the month of September to two things and blog about them. Two very different things. First is this:


I'm not unhappy with how much I weigh, just how soft I am and how weak I feel. I'd love for my hubby to come home to a new, rock-hard me. Or at least a me without lower/side back squish. What is that all about anyway?!?

The next task I'm committing to is taking better photos. I want to capture moments and see them in print the way I remember them in my head. Bright, vibrant color. Crisp, clear images.


I feel like I'm getting a little bit better (check out my kick-butt cake photo!) but I need some extra guidance. And, to assist with this lofty goal (although I think the rock hard bod might be even more challenging) is the 31 Days to a Better Photo series from Darcy at Life with my 3 Boybarians. In October she'll be starting a new 31 day series so I want to make sure I'm ready to go.

Speaking of the October 31 day challenge (hosted by The Nester and in its 3rd year), is anybody else joining in or doing your own 31 day how-to? I love this idea and am trying to think of something that I could do in October that would benefit others. I've got a lot of knowledge up here in this noggin'. Unfortunately, I think I know a little about 31 different things, not 31 things about one subject :-) Anyway, wish me a healthy and shutter-happy September. 8 days until go time!

Tuesday, August 23, 2011

First birthday part-ay!

E's big birthday bash was a smashing success!

1st taste of birthday cake

We had such a fun time and the rainbow cake was a huge hit. I'm going to post a tutorial what-not-to-do list on making the cake because I learned a lot about working with layers while I slaved away on this cake labor of love for my baby girl. I know its been done a million times this year already but I stumbled across some things that I think can help others out if you're trying to make a similar tower of baked yumminess.

six layer rainbow cake

Here are a few more shots from our rainbow themed soiree. I hope you enjoy sharing a little in our fun day (although I have to say you totally missed out because this was one kickin' par-tay!).

cake table first birthday party rainbow theme circle garland

I made a rainbow garland, had different colored bags for favors, and used A LOT of candy to tie into the theme. We also had rainbow fruit kabobs (and a veggie tray and pizza).

circle rainbow garland

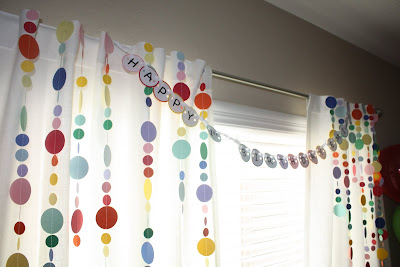
I used a two inch and one inch punch for the rainbow garland and I will be making this for EVERY party and holiday for the rest of time! I thought it was so fun and it was definitely an easy project. Two pieces of 10 different colors with two punches made roughly 70 feet of garland. Although I highly suggest NOT wadding it up in a plastic bag before using it because it got SUPER tangled. Duh. I had to cut it apart (which was ok because I needed some of it in segments) or lose my mind. I chose the former.

first birthday rainbow decoration and cake

I got a set of rainbow party hats at Target and added a one and some fuzzy pom poms to E's so it stood out from the others. All the kids enjoyed wearing their hat while we sang happy birthday. Here's my other sweet girl rockin' her rainbow look.


Like I said, the cake was a big hit and everyone thought I was A-Mazing for making it, but these fruit kabobs came in a close second in the "aren't you so clever" and "what a fun way to serve the fruit" department. There was also NONE left at the end of the night. I thought about layering it in a glass bowl trifle style but I'm so glad I used the skewers. Will be doing this again for sure.


And another shot of the cake because I'm so proud of it. There was blood, sweat, and tears involved, people! Like I said, more deets about that later. I think it deserves its own post.

And finally, a shot of the whole fam with the birthday girl. I love you so much Sweet E!


Friday, August 19, 2011

in a frenzy!

I've been in quite the frenzy doing this


because my mom will be at the airport in 45 minutes! And I'm blogging about it instead of getting kid#1 dressed (she's still in jammies) and getting kid#2 out of bed (she's snoozing). Oh crap, and I need to pack them snacks before driving to the airport. Sheesh. I'm running behind.

Hope everyone enjoys their weekend. We'll be officially celebrating E's birthday so I'll be back sharing pics of the hoopla next week.